Lightroom

We're Going Live! Announcing 4 Online Courses for 2024

We all love being in the field to shoot, but we all also know that opening the shutter is only half the task of creating a great photograph. The other half is processing.

To help with that second half, National Parks at Night periodically offers online post-processing workshops, and today we’re excited to announce the next rounds of those. Moreover, not only are we announcing new sessions for two popular courses we’ve run in the past, but we’re also launching two brand new courses!

The two returning courses are Lightroom Live and Photoshop Live, both of which lead attendees through the basics of mastering these two incredible tools of the digital darkroom. The two new courses take things a few steps further, with Black and White Live and Processing Night Panoramas Live teaching attendees how to master the ins and outs of these specialty areas.

We’ll be hosting all four of these online courses this spring. Each will take place on weekday evenings, two evenings per week, for two weeks—for a total of eight hours of group education over four nights. We also limit each course to 12 attendees, to ensure time for individual attention to questions and answers. Along the same lines, after the course each attendee will be offered a half hour of one-on-one time with an instructor of their choice.

For more information about each of these online workshops, continue reading below. (And in each section, check out our free tip!)

Black and White Live

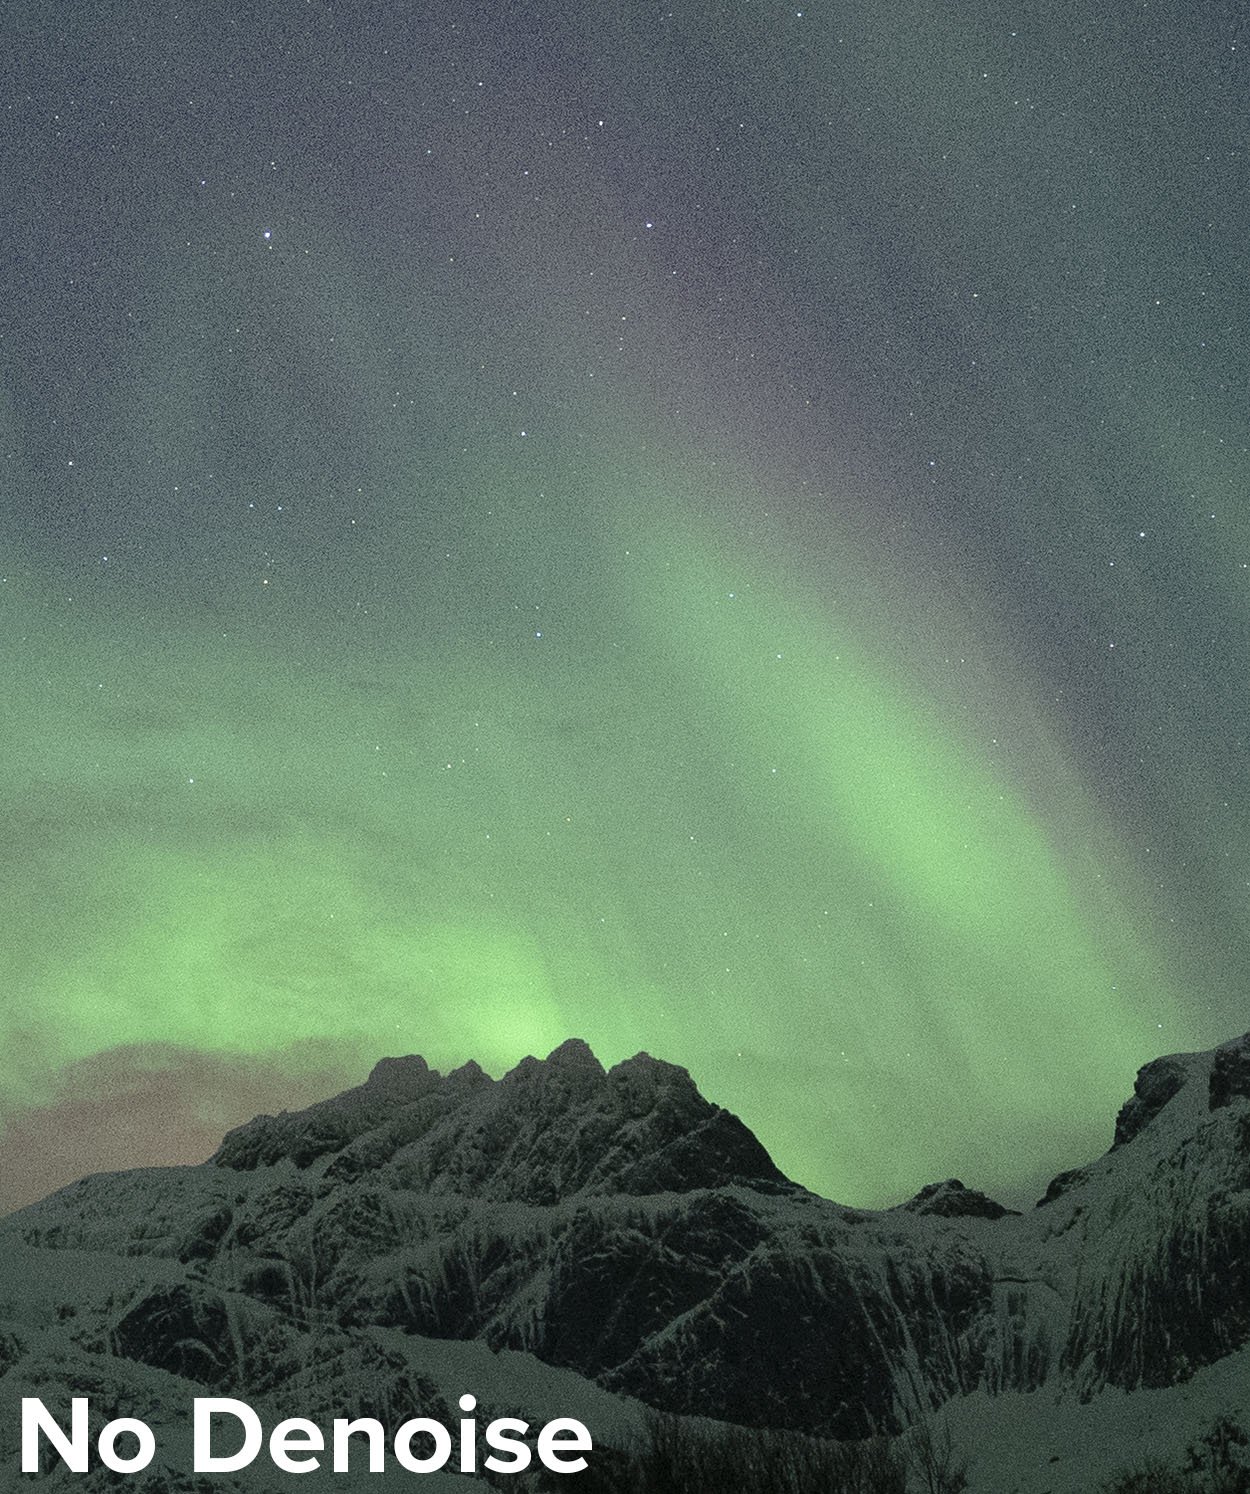
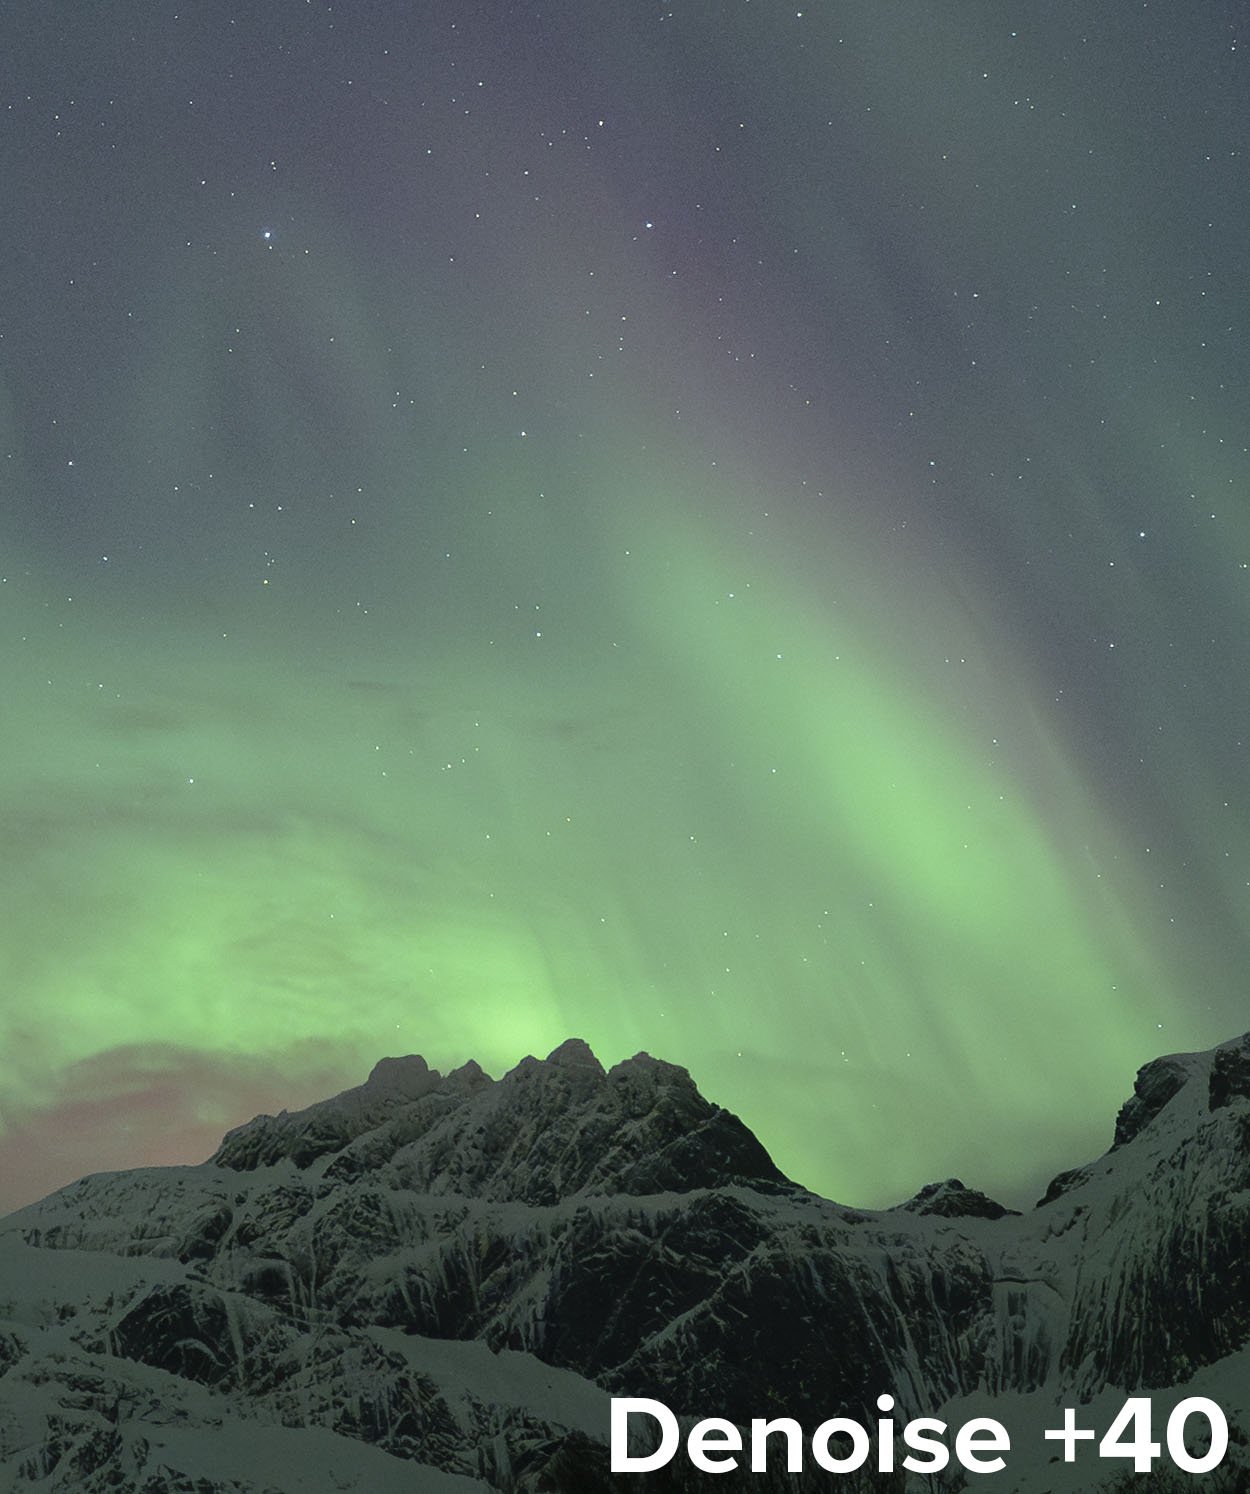
Black and white imagery has always had an aura of timelessness, drama and sophistication. Using this scheme at night is no different. Since photographers shooting in monochrome cannot lean on color to provide information in any given scene, we are forced to concentrate on other building blocks to evoke emotion, to tell a story or to capture the drama. This four-night online workshop will guide you on the journey through all of that and more.

This course will teach many aspects of the digital black and white process, from tips on capturing the best raw materials in the field to processing with what we consider the best software for the job, Silver Efex Pro.

You’ll also learn what creates a great black and white image, how to understand and control tonal contrast, how to apply local enhancements to create glowing images, and more.

Black and White Tip from Lance

If you’re setting out to create black and white images, learn to see that way in the field. Your camera can help you, as if you set it properly, then it can preview your images in black and white right on the LCD. In the camera settings, change Picture Style (Canon), Picture Control (Nikon) or Creative Style (Sony) to Monochrome or Black and White. This will help you avoid passing up photographing a scene because it lacks interesting color. One example of this would be an urban night scene illuminated exclusively by sodium vapor lights. In color, those scenes are usually quite unappealing, but they often look great as black and white.

Processing Night Panoramas Live

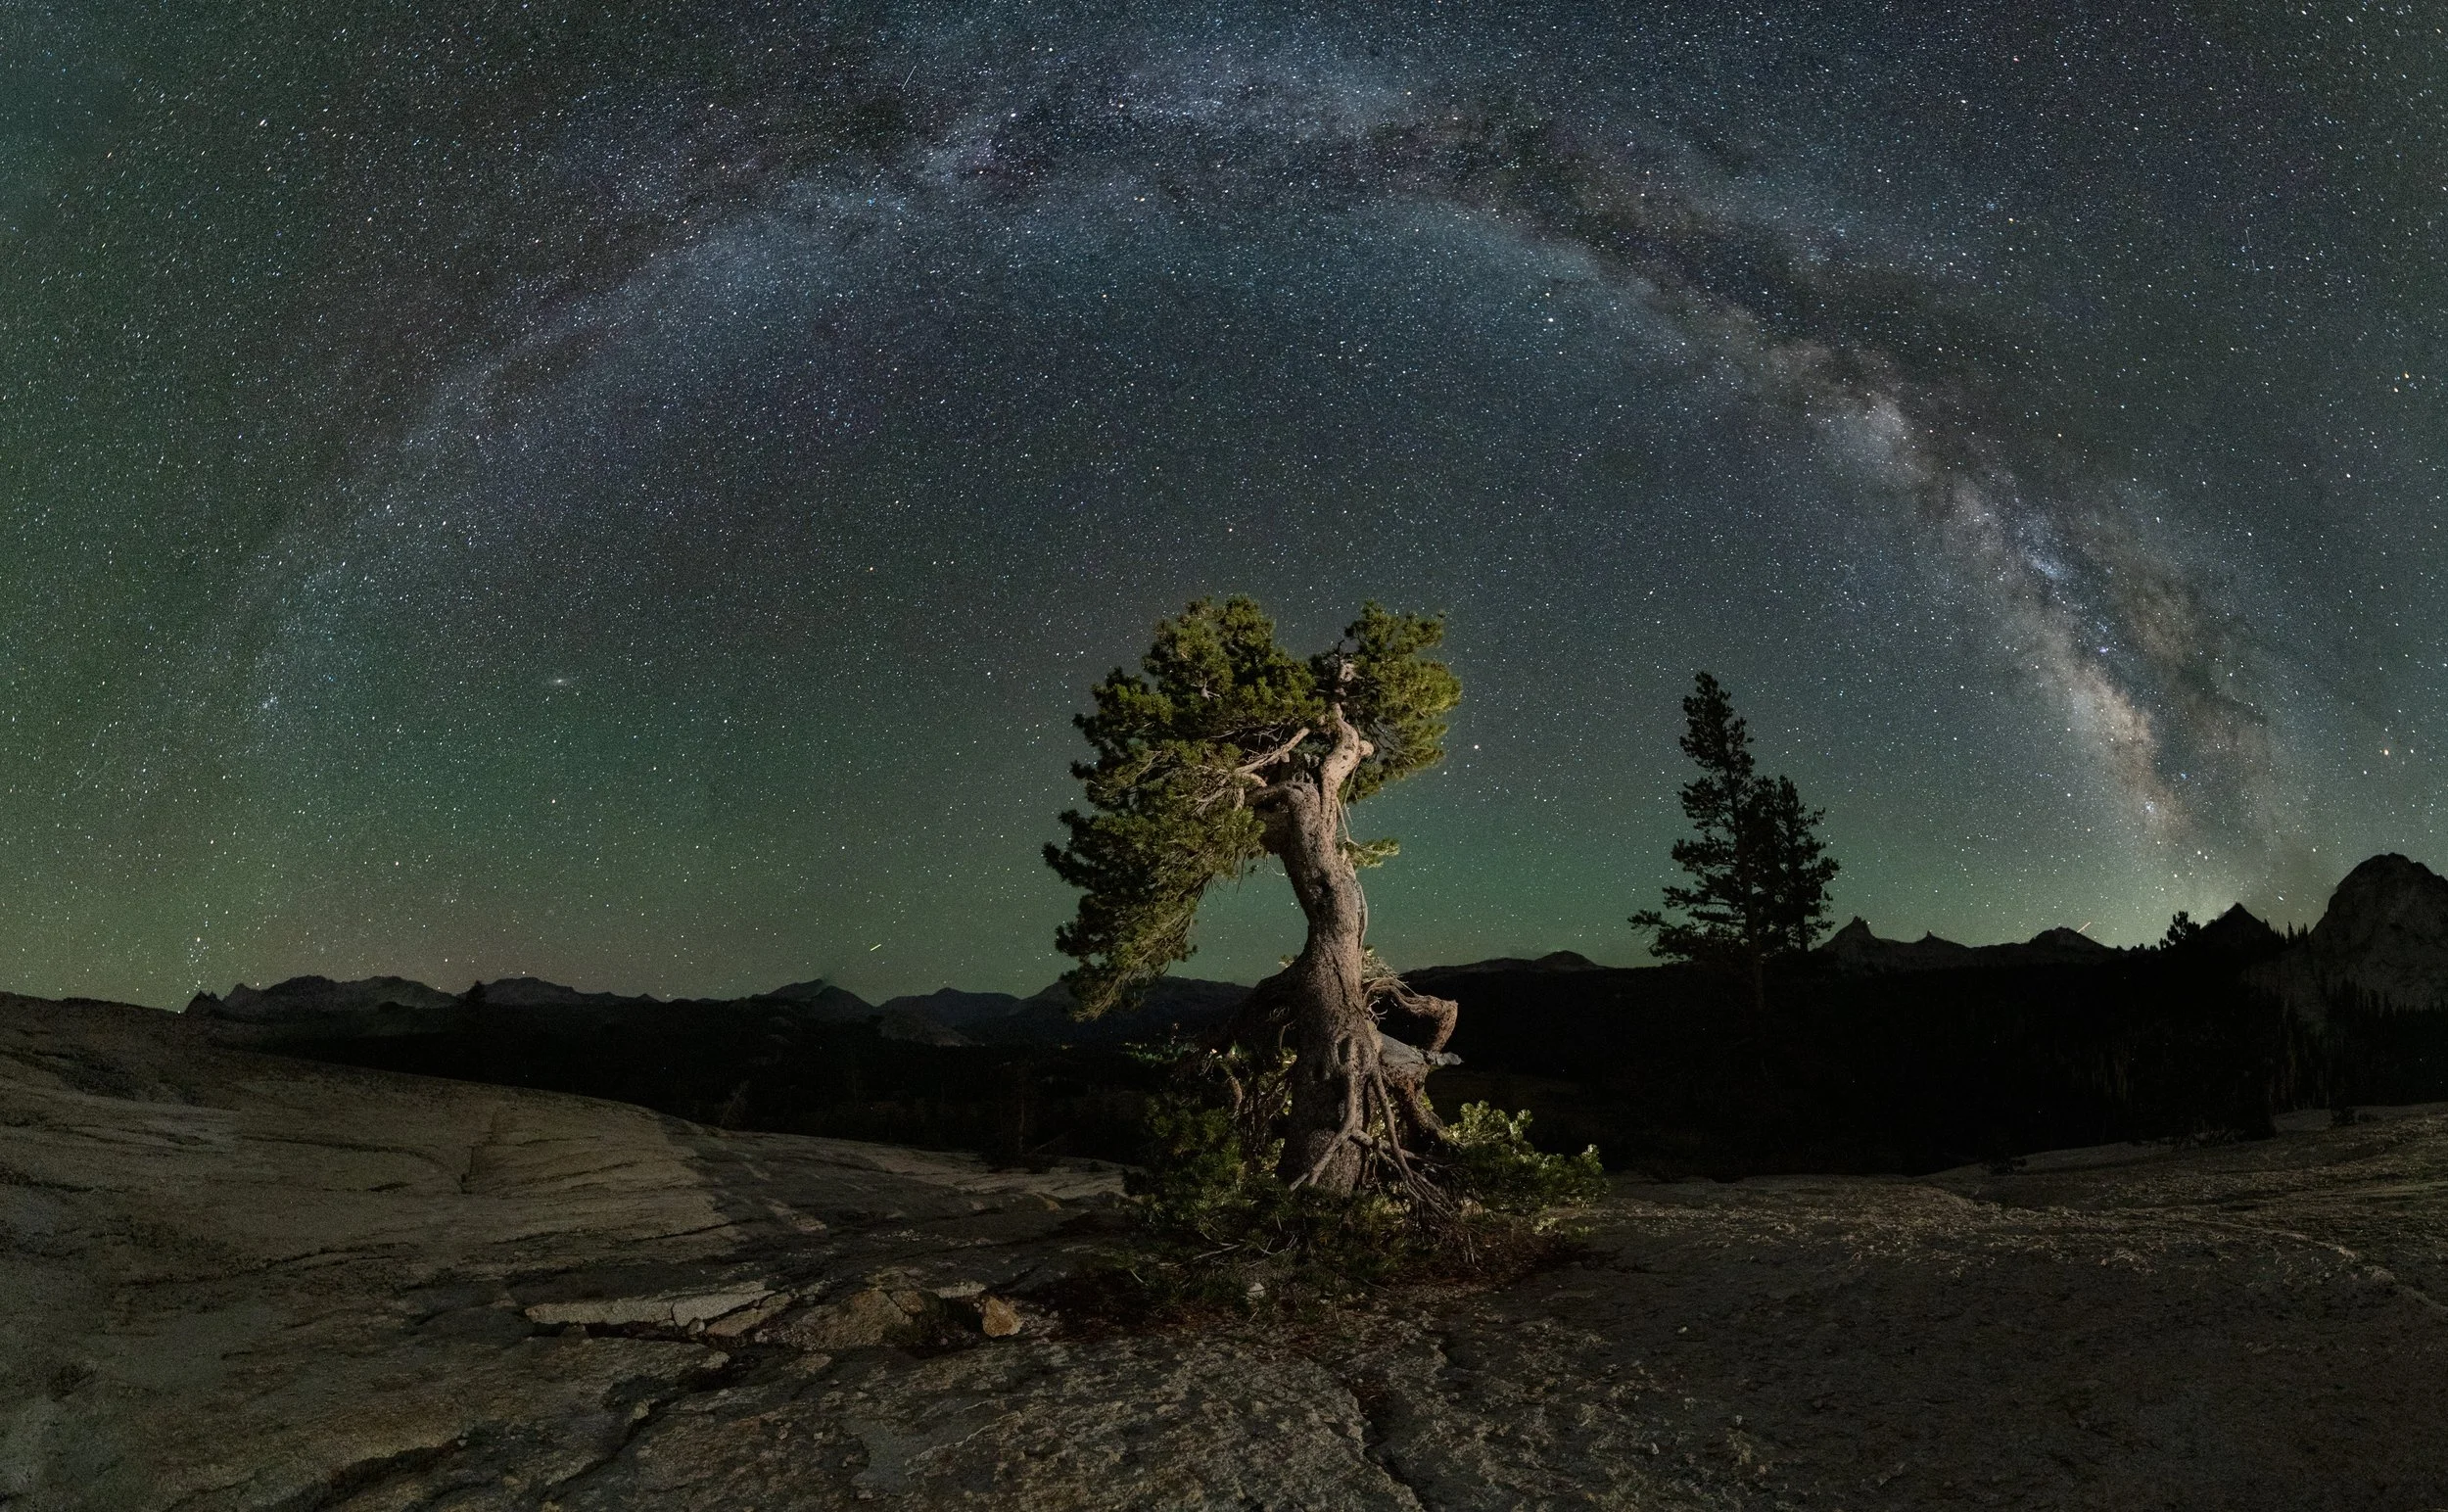
Stitching panoramas can be challenging enough with daytime photographs—the complexity increases even more for images captured at night. If you’ve ever struggled with stitching panorama panels, this is the course for you. We will teach how to process simple and complex night panos in Adobe Lightroom Classic, Photoshop and, most importantly, in PTGUI Pro.

In this online workshop you’ll learn not just how to stitch basic panoramas, but also how to blend twilight and star-point panos in Photohsop and PTGui, how to stitch vertoramas with both star-point and star-trail toppers, how to understand and choose different projections, how to create “tiny planet” photos, and more. The course will also feature a full demonstration of the best stitching software out there, PTGui Pro, with a focus on how to use it for night panos.

Pano Processing Tip from Matt

When stitching a vertorama in PTGUI Pro, be sure to choose among the transverse projection variants. Then click and drag to place the true horizon on the center horizontal line. (If the horizon is behind a landform, align with that instead of the skyline.) Chances are the final result will look just like you envisioned … perhaps better!

Lightroom Live

For 99.9 percent of the photography world, the process of post-production starts with Lightroom. Yet so many photographers feel that they don’t fully understand the software, let alone know enough to wield its full potential.

With a strict focus on the Library and Develop modules, in this online course you'll learn how to add keywords, create collections, globally adjust your images and fine-tune your masterpiece with local adjustment tools.

And as a bonus, you’ll get our video Lightroom: Correcting Your Catalog Chaos.

Lightroom Tip from Gabe

Most of our night skies have atmospheric haze, especially from the horizon to 20 degrees above, which is where the core of the Milky Way tends to reside most of the year. Lightroom’s Dehaze slider was built to cut through haze and provide more separation in the lower-contrast areas of the scene—but it also works wonders on dark night skies! A little Dehaze can go a long way in making your stars and the Milky Way pop. Watch out though, because Dehaze also increases saturation and can make your skies too purple or blue, so be ready for a potential color adjustment afterward.

Photoshop Live

Photoshop is a challenging program to learn on your own. And it’s also massive. But don’t worry—as a night photographer, you don’t need to learn every tool, setting and checkbox in order to harness the program’s power. Having a good foundation of the program and some basic knowledge of key features (as well as intricate knowledge of some subtle features) will help you develop the skills necessary to create advanced night photography composites and finely crafted images.

Our areas of focus will be understanding the architecture of Photoshop, strategies and best practices for using layers, mastering advanced local adjustments, masking, and much more!

Photoshop Tip from Chris

Photoshop has lots of selection tools. Magic Wand. Quick Selection. Object Selection. There’s a tool for selecting the sky, or a subject, or a focus range, or a color range. Which is best? All of them! Each of the selection tools has their pros and cons, and situations where they outperform their counterparts. Therefore, learn how to use each of these tools and practice with them all. You’ll learn the situations that each excels in, and then you’ll always know which to use in different scenarios.

Come Learn With Us Online

Wherever your next passion for learning lies, we hope that one of these online courses can help. For more info on each, click here:

We look forward to seeing you there!

Chris Nicholson is a partner and director of content with National Parks at Night, and author of Photographing National Parks (Sidelight Books, 2015) and Photographing Lighthouses (Sidelight Books, 2024). Learn more about national parks as photography destinations, subscribe to Chris' free e-newsletter, and more at www.PhotographingNationalParks.com.

UPCOMING WORKSHOPS FROM NATIONAL PARKS AT NIGHT

The Night Photographer's Guide to Star Stacking (Part III)

Note: This is the third in a three-part series about creating star trails with the stacking technique. Part I covered how to shoot the raw materials. Part II demonstrated how to edit the individual frames in Lightroom and Photoshop to create the star trail stack. In Part III, below, Tim explains how to clean up artifacts that can occur when combining these images in Photoshop.


This is the third and final installation of our three-part guide to star trail stacking. We hope you have enjoyed the series so far. For those of you who didn’t catch Part I and Part II, we recommend reading those blog posts before you jump in here, so that you are up to speed with the capture and initial processing steps.

This method of creating star trail images is versatile and comes with many advantages, but it can also result in artifacts that need to be corrected in order to create a polished final image—things such as plane trails and stray light, which can appear on individual frames during capture.

Star trails over Animas Forks, Colorado. Nikon Z 6II with a Nikon Z 14-24mm f/2.8 S lens at 15mm. 17 stacked frames shot at 4 minutes, f/2.8, ISO 640.

While the fact that these artifacts exist at all might make you question whether to use this technique to begin with, the opposite is true: These problems can appear in any long exposure of the night sky, and the stacking technique gives you more power to remove them in a way that doesn’t harm your final image.

Indeed, that we can remove common artifacts from individual layers is a great reason to choose the technique of shooting multiple shorter exposures and stacking them together in Photoshop rather than shooting one long exposure.

In This Video

In the following video I’ll cover:

  • exporting your images from Lightroom into Photoshop

  • changing blending modes to create the initial star trail composite

  • identifying and working on individual layers

  • removing plane trails from individual layers using the Spot Healing Brush

  • the difference between layers and masks

  • creating layer masks and using the paintbrush to remove unwanted items that appear on individual frames

  • using selections to remove unwanted items that appear on individual frames

  • streamlining the editing process by grouping layers

  • using color labels to mark important layers

  • when to flatten your image and when to retain the layers

  • creating a composite layer to enable edits that can’t be done to multiple layers

  • renaming your Lightroom files to reflect the file’s status

Your Turn

Have you been creating star trail images using the stacking technique? We’d love to see your photos! Share in the comments below, or on our Facebook page, or on Instagram (tag us @nationalparksatnight #nationalparksatnight #seizethenight).

Tim Cooper is a partner and workshop leader with National Parks at Night. Learn more techniques from his book The Magic of Light Painting, available from Peachpit.

UPCOMING WORKSHOPS FROM NATIONAL PARKS AT NIGHT

A Whole New Bag of Tricks: Check Out the Features in Adobe's Latest Update

Earlier this week Adobe released its latest updates to Lightroom and Photoshop. As happens sometimes, this particular release included some tweaks that are exciting for night photographers.

The biggest among those was the introduction of Lightroom’s new AI-based Denoise feature, which is simple to use and amazingly effective. On Tuesday we published a video post that explains the new Denoise feature (see “Cutting Through the Noise: Lightroom Just Made Night Photography Better”). You can see the power of this new tool in these before and after pictures:

But Denoise isn’t the only new thing to be excited about in Lightroom and Photoshop. Several other new features in this release will prove to be a real benefit for the night photography enthusiast. In today’s blog post, I’m sharing a video to show all the new tools and tweaks that you’ll want to look into, as well as some tips on how to use them, including:

  • the new ability to use Lightroom Curves adjustments on a masked selection

  • how to use the targeted adjustment tool to speed up manual changes to Curves

  • the new ability to open multiple images into the same Photoshop file as Smart Object layers (and why you’d want to do that)

  • two examples of using two Smart Object layers for better control when creating a blue hour blend

Check it out below.

Wrapping Up

All in all, it’s a great day to be a night photographer!

What are you most excited about in the latest Adobe updates? What photos are you making with them? Share in the comments below, or on our Facebook page, or on Instagram (tag us @nationalparksatnight #nationalparksatnight #seizethenight).

Tim Cooper is a partner and workshop leader with National Parks at Night. Learn more techniques from his book The Magic of Light Painting, available from Peachpit.

UPCOMING WORKSHOPS FROM NATIONAL PARKS AT NIGHT

Cutting Through the Noise: Lightroom Just Made Night Photography Better

While Adobe’s focus is on creating benefits for all photographers, every now and then they come up with a feature that is a huge benefit to us night owls, in particular.

This is the case with their latest Lightroom update (12.3). As of today, Lightroom users have AI noise reduction—and we’ve tested it, and it’s excellent. For those of us shooting high ISOs at night, this stands to be a game-changing addition to our processing workflow. Simply put: It makes night photos better.

Milky Way at White Pocket. Nikon Z 6II with a Nikon Z 14-24mm f/2.8 S lens at 24mm. 2 minutes, f/4, ISO 1600 (foreground); 8 seconds, f/2.8, ISO 6400 (sky); blended in Photoshop. Both images used Adobe Lightroom’s new Denoise slider at a setting of 23.

Adobe’s new Denoise tool works seamlessly within the Lightroom raw workflow. It can be applied to images just out of the camera or to images that you have already labored over in the Develop module—including those you have processed using complex masks.

The process of ridding your images of noise in Lightroom couldn’t be easier. Check out the following video for our tips and tricks on using Adobe’s fantastic new AI noise reduction feature.

Of course, this isn’t the only update Adobe made this week, but we wanted to immediately get you the news on this huge improvement for night photographers. Be sure to check out our blog post this coming Saturday, in which we’ll cover more about Denoise, plus other new features that will help out night photographers.

Tim Cooper is a partner and workshop leader with National Parks at Night. Learn more techniques from his book The Magic of Light Painting, available from Peachpit.

UPCOMING WORKSHOPS FROM NATIONAL PARKS AT NIGHT

Editing Auroras: How to Post-Process Your Northern Lights Photos

If you’ve read our previous blog post, or if you’ve been reading the news, or if you’ve been outside at night in the past two weeks, then you are already aware of the fantastic displays of auroras that have been dazzling observers even at latitudes that hardly ever see the phenomenon.

We were fortunate to have experienced these auroras on our recent photography tours to Iceland and Norway’s Lofoten Islands, which was the subject of last week’s post (“Spring Solar Storm Brings a Week of Amazing Auroras”), as well as the subject of our Instagram feed all this past week (and next).

Auroras over Gimsoystraumen, Lofoten Islands, Norway. Nikon Z6 II with a Nikon Z 14-24mm f/2.8 lens at 14mm. 6 seconds, f/2.8, ISO 3200.

If you’re outside shooting at night, such an amazing display of northern (or southern) lights tends to generate a lot of of frames to bring home. And that translates into a lot of post-processing on the to-do list.

We’d like to help. So we decided to create a tutorial on how to process your beautiful aurora images.

In This Video

In the following video I’ll show you how I use Lightroom to maximize the visual power of auroras in your night photos. I’ll cover:

  • techniques to control contrast and brightness

  • the Dehaze, Exposure, Shadows and Whites sliders, and how they can be used to better separate auroras from the surrounding sky

  • using profile corrections to even out the sky

  • local and global adjustments to target individual areas of the scene

Your Turn

Have you been out photographing the auroras? We’d love to see your photos! Share in the comments below, or on our Facebook page, or on Instagram (tag us @nationalparksatnight #nationalparksatnight #seizethenight).

Tim Cooper is a partner and workshop leader with National Parks at Night. Learn more techniques from his book The Magic of Light Painting, available from Peachpit.

UPCOMING WORKSHOPS FROM NATIONAL PARKS AT NIGHT